Don’t let those cute puppy-dog eyes fool you! Young pups can get just as smelly, if not more so, than adult dogs. With their inquisitive nature, pups have a penchant for getting into all kinds of messes.
Whether your pup has just rolled in some mud or they got face-to-face with feces,
there’s going to come a point when you need to bathe your pup for the first time.

That first puppy bath is a crucial one. Bathing is an important part of the grooming process. Up until this point, your young pup only had to rely on Mom for cleaning.
Now, the job is in your hands!
You must get your puppy comfortable with the bathing process. It’s something you’re going to do regularly throughout their life.
The first bath can make or break the experience. It will impact how they respond to baths in the future.
If you’re nervous about your puppy’s first bath, don’t fret. We’ve created this step-by-step guide to bathing your pup to ease your worries.
Read through before you start your bathing journey, as we’ve included several tips to make the process as breezy as possible.
Now, onto the bathing!
Step 1: Gather Your Supplies
Before you do anything, you need to collect all of the supplies you’ll need. The last thing you want is to leave your pup unattended while you chase down a brush or towel.
There are several must-have tools to buy. To give your dog a successful first bath, you should have a:
- Table
- Dog bathtub or container
- Shower sprayer
- Rag
- Brush
- Puppy shampoo
- Tower
- Treats
Those are just some must-haves. Chances are, your supply list will evolve once you and your dog find your groove. But for now, those essentials should have you covered for your dog’s first bath.
Step 2: Desensitizing
Next, you’ll want to desensitize your dog to some of the sights and sounds they’ll experience.
It’s important to remember that everything you’re doing is completely new to your puppy. There’s bound to be some resistance and anxiety.
Place your dog onto a table.
Make sure to put a towel or non-slip mat on it first so that your dog stays put. Putting your dog on the table shows them that it is not the time for play.
Now, turn on the water in the tub. After that’s done, let the hairdryer run for a few minutes. Show your dog that there’s nothing to be scared of. Don’t forget to take advantage of treats and provide verbal praise!
Related: Why do Dogs Hate the Sound Vacuum Cleaners?
Step 3: Examine the Fur
With your young furry friend on the table, give their coat a good look-over. There are a couple of reasons why you want to do this.
First, it gives you more information about the type of shampoo you’ll need to use. Dense double-coats are going to need a different cleansing formula than short fur.
Secondly, examining the fur will help you take note of any problem areas that need addressing.
Look out for mats, tangles, or bugs. If your pup has a thick coat, they could be harboring some pests or sand spurs. Take this opportunity to remove them.
Step 4: Brush the Coat
Use an appropriate dog brush to make your pup’s fur smooth. Get rid of mats and tangles.
This step will also get rid of some loose dirt and hair. Canines can lose a lot of fur during bath time, which can clog up your drains. A good brushing will limit this as much as possible.
On top of all that, it’ll make your pup feel more comfortable. It’s an opportunity for them to get used to being touched. Talk to your pup and make them feel comfortable!
Step 5: Fill the Tub
Put your dog in the tub or container and start filling it up with water. Keep the water pressure moderate to ensure that the noise of gargling water doesn’t startle your anxious pooch!
Use lukewarm water. Whether or you’re inside or outside, you don’t want to have extreme temperatures in any direction.
Allow the tub to fill up to your dog’s knees. There’s no need to fill the tub beyond that point.
Step 6: Soak Your Dog’s Fur
Using a shower sprayer, soak your dog’s fur. You can also use a small cup or pail to get this done, but a sprayer attached to the water spout is much more effective.
Make sure that you’re saturating the fur with water. It needs to penetrate all the way to the skin.
If your dog has a dense double coat, you may have to use your fingers to separate the fur a bit.
Be extra gentle around the face and eyes. You can use varying levels of water pressure throughout the body to strike a good balance between comfort and efficiency.
Step 7: Apply the Shampoo
Apply a small amount of shampoo as directed by the instructions on the bottle.
Make sure you read the instructions thoroughly before you start bathing your dog. Some formulas will require dilution or extra preparation before use.
Apply the shampoo all over the body. Avoid open areas around the face, such as the nose, mouth, eyes, and ears. Shampoo can be irritating on the eyes, so be very gentle.
Related: Best Dog Shampoos to Get Rid of Smelly Odors
Step 8: Scrub Gently
Here’s the part your dog will love!
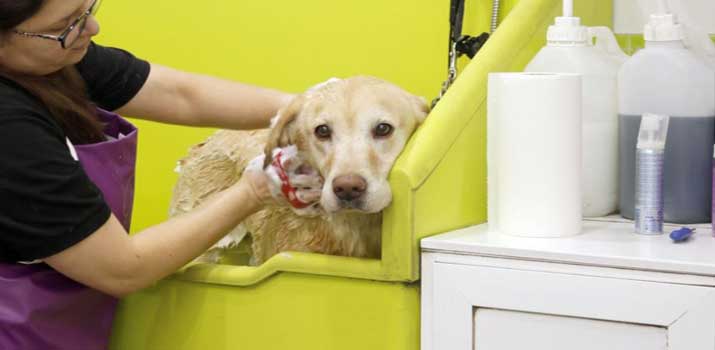
Use your fingers to work up a nice lather with the shampoo. Scrub your dog clean and make sure that the solution really gets in there.
Of course, be gentle and provide plenty of love. If you do this right, your pup should feel safe in your hands!
Step 9: Rinse and Condition
Now it’s time to rinse! Spray your dog’s fur with clean water and get all the shampoo. It’s important that you get rid of every last sud! If there’s any doubt, apply more clean water!
Leftover shampoo residue can cause irritation. If left untreated, it could eventually cause a rash. Make sure to address any folds in the skin.
Shampoo strips the skin of natural oils, so you may want to follow up with a conditioner. This may not be necessary with all dogs.
This is especially true if you plan on using a detangler spray or leave-in conditioner afterward.
Applying conditioner is just like using shampoo. Read the directions and make sure to leave it in for the recommended amount of time. Then, rinse it off thoroughly.
Your pup’s fur should be silky smooth!
Step 10: Towel Drying
The moment you let up on rinsing, your puppy will likely do a vigorous shake to get some of that excess moisture.
Be prepared to get splashed! This is a completely natural behavior. Let your pup do his or her thing.
Drain the tub and let your pup get a few good shakes out. While messy, those shakes will make drying a lot easier.
One they’re done, you can start drying their body with the towel. You don’t have to make the fur completely dry. The goal here is to stop the dripping.
Pay close attention to the paws. Water tends to accumulate down there.
Use a few microfiber towels to get your dog as dry as possible before moving on to power drying.
Step 11: Power Drying
There’s a good chance that this is the part that your pup isn’t going to like so much. Hopefully, your pup got somewhat comfortable with the sound of the dryer early.
Take things slow and let your pup feel comfortable with the process.
Use a hairdryer on the lowest setting. You can also use a no-heat handheld dryer. These are similar to what professional groomers use.
Keep the device several inches away from your dog’s body and keep moving!
If you’re using a dryer with heat, don’t let it sit on one spot for more than a second or two.
Otherwise, you could burn your dog. Also, avoid blowing air directly on the nose and ears.
Take your time to dry out the fur completely. Some slight dampness is fine, but you don’t want there to be any soaked areas.
Step 12: Brushing and Fur Treatment
When your pup is fully dry, you can go through with the brush again. This should take too long, as the drying process helps make the fur soft and smooth.
If you plan on using a detangling spray or leave-in conditioner, now is the time! Apply it according to the instructions.
Step 13: Provide Lots of Love and Treats
Finally, show your dog a lot of love! They just successfully made it through a bath. It’s the first of many to come. The occasion definitely calls for some treats!
Praising your dog will teach them to love bath time.
The more you bathe your dog, the more comfortable they will get. Before you know it, your dog will sit still and know what to do when it’s time for grooming.
Tips and Tricks
Bathing your pup is pretty easy once you get into the swing of things. That said, there are a few things you can do to make the task more efficient.
Start With Rag Baths
If your dog is less than eight weeks old, there’s no need to jump right in with shampoo. Younger pups can do just fine with a simple rag bath.
Rag baths don’t take nearly as long. Not only that, but it’s a great time to get your dog comfortable with being touched and feeling water.
After they hit about eight weeks of age, you can graduate to shampoo for a deeper clean.
Consider Ear Cleaners
Your pup’s ear canals are very sensitive. They’re L-shaped and can easily trap moisture in. Leftover water in the ears can cause infections and fungal issues.
To eliminate the risks of ear infections, use a specialty cleaner. Antifungal and antibacterial ear cleaners will clean the ear canal right up.
They can dissolve wax and keep bacteria under control. Furthermore, many cleaners help to evaporate excess moisture.
Once your dog is comfortable with bathing, we recommend following up with an ear cleaner to ensure that all the moisture is gone.
Stick to a Routine
The key to getting your pup comfortable with bathing is repetition. Develop a bathing schedule and stick to it. A bath every two or three weeks is a good start.
As they get older, you can extend that to every month. Either way, that regular early exposure will do a lot to help your pooch get used to this lifelong task.
Conclusion

Dogs have a reputation for running for the hills whenever bath time comes around. The reason many dogs hate bathing is that they lack that early exposure.
By giving your pup baths at a young age, you can set them up for a life of calm and collected cleaning!
Just follow these step-by-step instructions to make your puppies first bath a success. Once you’ve conquered that first hurdle, it’ll only get better from there.
Also Read: 12 Tips to Make Dog Fur Soft & Shiny:

